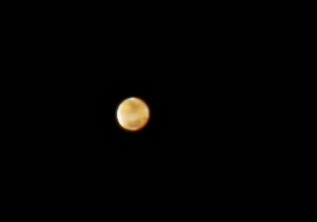
Spur of the moment pictures I took of the eclipse. I had the telescope out and figured why not give it a shot.
Monday, August 21, 2017
Sunday, September 21, 2014
Star Party at TJC Center for Earth & Space Science Education
Friday, March 14, 2014
Mars
For 5 years I've wanted to see features on Mars. Last night I finally did and here is the proof :)
![]() |
| Mars in motion (5 frames rotating back and forth). |
![]() |
| Here are the 5 keepers from my shoot. |
![]() |
| Shot 7 Still |
![]() |
| Stellarium Screengrab for reference |
Sunday, January 19, 2014
Day and Night viewing
This is my first decent sun picture.
- Stellarvue SV70ED
- Canon EOS T3i unmodified
- Orion glass solar filter
- 25 shots stacked using Registax 6
- ISO 100
- 1/500th of a second shutter speed
![]() |
| click for larger |
This is my first try for the Crab Nebula (Messier 1)
- Stellarvue SV70ED
- Canon EOS T3i unmodified
- 10 shots stacked using Deep Sky Stacker / then Photoshop for levels
- ISO 1600
- 90 sec exposure (15 min total exposure)
![]() |
| click for larger |
Sunday, October 20, 2013
Canon T3i and a Full Moon
Last night at CESSE (TJC Planetarium) I tried out my new camera by taking some shots of the moon. It was pretty much full so not a lot of surface detail, but with around 6 shots I made this large mosaic in natural color.
Sunday, June 9, 2013
Capturing Saturn and seeing a Meteor
It's been a while since I've had my rig out and I was worried that I'd miss Saturn. After upgrading my firmware (Motor Control and Hand Control) I can now do All Star Polar Alignment. The idea is even if you can't see the North Star you can do an accurate Polar Alignment...
What they don't tell you is it's not much fun to do and even harder than doing a regular polar alignment using your polar scope. They need to make an easier way to adjust the alt and az instead of doing the screws that are hard to reach while looking through the EP. Anyway - once I was aligned it seemed to work OK. I really need a dome so I can setup and stay aligned, but that's another issue to be dealt with later ($$$).
Saturn - the reason I was out there to begin with.
What they don't tell you is it's not much fun to do and even harder than doing a regular polar alignment using your polar scope. They need to make an easier way to adjust the alt and az instead of doing the screws that are hard to reach while looking through the EP. Anyway - once I was aligned it seemed to work OK. I really need a dome so I can setup and stay aligned, but that's another issue to be dealt with later ($$$).
Saturn - the reason I was out there to begin with.
Here's my best shot of Saturn - I doubled the pixels to get it larger. In the future I need to work out how to barlow my flip mirror, but for the time being I'm happy with the surface detail I achieved by limiting my exposure time to 4:10. Any longer than 5 minutes and the planet rotation blurs the details - thanks Jerry Lodriguss for teaching me about that.
Below is all of the good shots with their ISO and shutter speed / exposure time (taking 1:1 video) - each one gave me about 3200 stills so that's not bad for lucky imaging.
These are 1:1 pixel sized so this is exactly the size I got from the camera. You can see they are pretty small so my 2.5 barlow would have made a huge difference... I just need to work out how to stack the equipment up without being unstable.
Things to do next time
- Set up a little earlier when it's getting close to dark and use a real compass to align the mount so I'm relatively close.
- Use my barlow to get 2.5 x magnification - with my C8 I'm getting plenty of light, just need to get up close.
Bonus
As a plus I saw a nice meteor in Scorpius (see below for the location from Skymap HD). I haven't ever really done any good watching for meteors, but since I was already pointed in that general direction I saw a really nice one during this relatively minor shower (2/hour isn't anything special so seeing one is cool).
Wednesday, March 13, 2013
Panstarrs C/2011 L4 and more
We had a great time at the Mineola Nature Preserve on 03/13/2013 looking for PanStarrs C/2011 L4 (Magnitude 1). While we were waiting I did get a shot of the moon 1 day after New (so a fingernail to be sure). Once it darkened up I tried my luck with the Double Cluster in Perseus, Horsehead Nebula in Orion and Andromeda's Galaxy
![]() |
| Fingernail Moon |
![]() |
| PanStarrs C/2011 L4 in the twilight sky |
![]() |
| Double Cluster in Perseus |
![]() |
| Flame Nebula (left) and Horsehead (right) in Orion |
![]() |
| My first attempt at Andromeda's Galaxy |
Saturday, January 19, 2013
Jupiter at Jon Watkins' House
Jon Watkins was nice enough to have the club out to his house again and this year we pretty much focused (get it) on Jupiter. I looked up when the red spot would transit and luckily got some shots of it while it was in view. I made a looping animation to show the movement and moons and then did some color saturation and contrast on the image I liked the best to show off the bright colors.
Shooting rig - C8 with a Meade flip mirror and Canon EOS T3 (12.2mp) - I was using EOS Capture to control the camera and record from the live view feed w/ a 5x zoom. That gives me (according to Jerry Lodriguss) a pretty much 1:1 pixel density so I'm getting as good a shot as I can get. I didn't crop at all so what you see is exactly what I got.
Looping animation of 18 frames - some are a little darker, but it's a neat effect. If you look closely at the top of the image you can see two of the moons moving in different directions (one is close and the other is far so you can see how they orbit).
Still frame of the first good shot. I bumped up the color saturation and contrast to make the colors more visible, but other than that I was just glad to get a decent shot of the red spot. Sure I'd like to have used a barlow lens, but I'm glad to at least get the opportunity and have some fun learning my rig.
Shooting rig - C8 with a Meade flip mirror and Canon EOS T3 (12.2mp) - I was using EOS Capture to control the camera and record from the live view feed w/ a 5x zoom. That gives me (according to Jerry Lodriguss) a pretty much 1:1 pixel density so I'm getting as good a shot as I can get. I didn't crop at all so what you see is exactly what I got.
Looping animation of 18 frames - some are a little darker, but it's a neat effect. If you look closely at the top of the image you can see two of the moons moving in different directions (one is close and the other is far so you can see how they orbit).
Still frame of the first good shot. I bumped up the color saturation and contrast to make the colors more visible, but other than that I was just glad to get a decent shot of the red spot. Sure I'd like to have used a barlow lens, but I'm glad to at least get the opportunity and have some fun learning my rig.
Saturday, November 3, 2012
Jupiter and Uranus
So far I'm feeling pretty good with the C8. I've gotten the collimation to a point where I'm reasonably happy with it. It's no refractor, but I'm probably spoiled now that I've gotten a taste of the clear stuff (even if it is a little purple-y). That being said I'm in love with my new flip mirror setup. It's well worth the money especially now that I've worked out the focus and can get reasonably close before flipping over to the camera. I'm sure I'll eventually get a guider, but for the time being I'm enjoying the process of learning to image planets without one. Turns out I only get about 2 min per shot of Jupiter before the planet rotation causes the features to blur.
Jupiter on a loop - I have about 7 decent frames and it's looping
back and forth so you can see some of the details.
Here it is with some levels applied to bump up the contrast.
You can't see the moons now, but the planet looks better.
Uranus - it's small and blue, but you can tell it's a planet.
Saturday, October 20, 2012
Harrison's first star party
![]() |
| Harrison showing his star chart to his public |
My son Harrison is a cub scout, but even if he wasn't he'd want to participate in a star party (even if just because I'm into it). Tonight we brought his 70mm scope, I equipped him with a 25mm eyepiece and turned him loose. We'd practiced aiming at the house and his red dot was sighted in (fairly well) so I told him to show the kids the moon.
We had about 200 - 300 people and at least 100 kids who absolutely had to be in his line. He talked and showed and was an ambassador of the sky for hours. He explained to them that the red light would preserve their night vision and showed them how to use star charts and identify the bright stars. He kept his scope pointed (manually) at the moon and when people said they couldn't see anything he took care of it graciously.
I could not have been prouder of my Junior Astronomer son. Kids loved talking to him (in their language) and were really excited to have a person their size who was on the staff. :)
Sunday, August 26, 2012
First Light (in the daytime) with Solar Filter
Here's my first attempt at using a Solar Filter. I purchased a glass one from Orion and even though it's really a snug fit I'm not worried that it'll fall off.
Wednesday, July 4, 2012
First Light - Celestron C8 OTA
So... my next stop was to check retail ($1200 - ouch) and start trolling the classifieds (CloudyNights.com) and dreaming of a new scope. I didn't want another huge one so the C8 seemed like the natural choice. I found one and ordered it (at a very good price) and tonight I had the first chance to use it.
To explain to the layperson new equipment is the bane of astronomers everywhere. It almost always is succeeded by weeks of bad weather, etc. For some reason I was able to get it out and try it the second night of having it (unheard of). That being said let me explain the situation... poor seeing, full moon and new equipment. I wasn't going to be taking great shots anyway, so I might as well start the learning process of a new piece of equipment so I don't waste a really good night learning my way around it.
I spent about 4 hours working on it getting my feet wet and trying to get a little success (Ring Nebula).
- Finder - the scope didn't come with a finder, but I had an extra red dot in the shed so that wasn't a big deal - still had to align it and the battery isn't awesome so probably need a new battery and possibly later on a nicer finder. Still... the price is right and it gets the job done. With my 70 I've not even been using a finder.
- Collimation - Fun fun - I forgot that part of owning a reflector (of any sort) is collimating it. After spending some time working on it and using my Hotech laser collimator I went to the Interwebs and watched a tutorial on how to laser collimate an SCT. The irony is to do it you have to have done a star collimation first anyway and marked the spot the laser points to. So in effect the laser doesn't get you aligned, just gets you back to whatever you originally were. Still... after trying two different times I achieved a level of collimation I'm not miserable about. I'm sure I'll get better at it, but for now I'm not worried that I bought a lemon.
- Mount Alignment - Polar alignment of the mount is crucial and after some mucking about and recalibrating I finally reached a decent alignment for taking some shots. It didn't help that the moon was whitewashing the entire sky, but like I previously mentioned this was supposed to be a dry run anyway.
Monday, May 28, 2012
M51 Whirlpool Galaxy and M57 Ring Nebula
I took these last night from my light polluted front yard with a streetlight beaming in my face. I didn't get to use the darks I took since apparently JPEGS are too artifact-y to do pixel by pixel noise replacement.
M51 - Whirlpool Galaxy - made up of about 60 1 min subs at ISO 1600 stacked using Deep Sky Stacker (and then adjusted with Photoshop)
M57 - the Ring Nebula - same setup as above, but about 75 subs (all in one whack using my automatic shutter remote once I figured out how to make it work properly).
Sunday, April 8, 2012
Help with imaging
I've been reading a CDROM book by Jerry Lodriguss called A Beginner's Guide to DSLR Astrophotography.
It's a really good tool for learning AP especially if you are like me and were trying it with a monster mount and 10" Newt. I was working myself to death and not balancing my equipment (weight and cost).
His book was why I sold that rig and re-outfitted with this one - http://fovet.blogspot.com/2011/12/starting-over.html
Anyway - here is his website where he shows off tons of awesome pics - www.astropix.com
The part that made me want to tell the world about him was this... I emailed him on his site and he got right back with me the same day with tips on what I was doing wrong. He's coming out with a new book in the fall for DSLR Planetary Imaging in mind so I can't wait.
Have fun and Clear Skies to all of you,
Robert B.
It's a really good tool for learning AP especially if you are like me and were trying it with a monster mount and 10" Newt. I was working myself to death and not balancing my equipment (weight and cost).
His book was why I sold that rig and re-outfitted with this one - http://fovet.blogspot.com/2011/12/starting-over.html
Anyway - here is his website where he shows off tons of awesome pics - www.astropix.com
The part that made me want to tell the world about him was this... I emailed him on his site and he got right back with me the same day with tips on what I was doing wrong. He's coming out with a new book in the fall for DSLR Planetary Imaging in mind so I can't wait.
Have fun and Clear Skies to all of you,
Robert B.
Sunday, February 26, 2012
Club Star Party at Jon Watkins' house
Star party in a blue zone (light pollution minimal) and being able to see the Milky Way is hard to beat.
![]() |
| Crescent Moon - stacked 3 shots at 400 iso 1/400th |
| Pleiades - nice and bright |
| I bumped the levels some to show how many stars we had. Sirius is the bright one in the center of the frame. |
![]() |
| Bode's Nebula (M81 and M82) |
![]() |
| The reason I bought my first telescope. Horsehead Nebula on the right (looks like a knight in chess) and Flame Nebula on the left. |
Sunday, January 15, 2012
Polar Alignment Scope
My new mount (Celestron CG-5) is nice and light, but it didn't come with a polar alignment scope. Basically it's a telescope that helps you align the axis with the NCP (North Celestial Pole) rather than Polaris (the north star). Polaris swings around in a circle each night and with this you can aim at the actual NCP and get better alignment. Sure I'd like an autoguider, but polar alignment is the first step.
I ordered it a few weeks ago and because Amazon has the product listed wrong (without mentioning whether it's a CG-4 or CG-5 scope) I received the wrong one. Called High Point Scientific and they graciously shipped me the right one and a label to ship the wrong one back. Fast forward to this afternoon and you'd find me out in the backyard attempting to get it aligned properly. I have a suspicion that since it was such a booger to get right the last mount I had wasn't aligned correctly. Calibration is the name of the game in telescope mounts, so I spend about 2 hours learning everything I could about polar scopes. I took mine apart (due to screwing the alignment screw in too far and having it drop into the scope itself). I discovered that the focus on the star schematic is to some degree in line with focusing on something fairly distant. I don't know if you've ever tried it, but focusing on something tall at like 45° is pretty hard unless you have an Empire State Building laying around.
Anyway - I finally got it aligned (3 screws w/ teeny allen heads ) and now it stays true whether the scope holder is on the left or right (and all points in between). Doesn't mean I'll always get good alignment, but at least I can't blame the polar scope.
Clear Skies :)
I ordered it a few weeks ago and because Amazon has the product listed wrong (without mentioning whether it's a CG-4 or CG-5 scope) I received the wrong one. Called High Point Scientific and they graciously shipped me the right one and a label to ship the wrong one back. Fast forward to this afternoon and you'd find me out in the backyard attempting to get it aligned properly. I have a suspicion that since it was such a booger to get right the last mount I had wasn't aligned correctly. Calibration is the name of the game in telescope mounts, so I spend about 2 hours learning everything I could about polar scopes. I took mine apart (due to screwing the alignment screw in too far and having it drop into the scope itself). I discovered that the focus on the star schematic is to some degree in line with focusing on something fairly distant. I don't know if you've ever tried it, but focusing on something tall at like 45° is pretty hard unless you have an Empire State Building laying around.
Anyway - I finally got it aligned (3 screws w/ teeny allen heads ) and now it stays true whether the scope holder is on the left or right (and all points in between). Doesn't mean I'll always get good alignment, but at least I can't blame the polar scope.
Clear Skies :)
Saturday, January 7, 2012
Sword of Orion
Last night was my first time using the new scope with the camera (and didn't have the EP protector between the camera and EP adapter). I'm still working on the other pics, but I had to post this one. The Sword of Orion contains Orion's Nebula. This is basically the same as the pic on the last post only much closer and a stacked version of 6 shots. I did 20 second exposures at 1600 (using the scope as a lens, so no f stop). I was in the front yard with tons of lights all around me, so I was pretty blown away to get this good of a shot.
![]() |
| Sword of Orion |
![]() |
| Betelgeuse (bright star on the left shoulder of Orion) |
![]() |
| Moon (about 3 exposures stacked for detail) |
![]() |
| Flame Nebula next to Alnitak (the left most star in Orion's Belt) top is mine and bottom is an example |
Thursday, December 29, 2011
New Pic (finally)
Here I am taking shots of Orion again w/ nothing more than a tripod. :)
I don't care as long as I'm out there doing new things and tonight was my first attempt with a digital SLR (new Canon t3).
10 second sub got me this shot - then I went to photoshop to do levels and add labels. It's not much, but at least I didn't leave the cap on this time :)
I took this in my front yard with streetlights all around and using a tiny (4 inches tall) tripod I was holding to keep steady. So with these humble beginnings I still had fun.
I don't care as long as I'm out there doing new things and tonight was my first attempt with a digital SLR (new Canon t3).
10 second sub got me this shot - then I went to photoshop to do levels and add labels. It's not much, but at least I didn't leave the cap on this time :)
I took this in my front yard with streetlights all around and using a tiny (4 inches tall) tripod I was holding to keep steady. So with these humble beginnings I still had fun.
Tuesday, December 27, 2011
First Light with Stellarvue
Tonight I finally got a clear evening to try out my new mount / telescope setup. I struggled with alignment basically because the two star method wants to use stars nearer the horizon than I have access to. It's hard to do alignment when you can't see lots of stars in both directions.
Anyway - I had some success with doing a one star alignment and spent some time looking at some crowd pleasers. I started with Polaris (since I was doing polar alignment) and eventually looked at Orion (Betelgeuse and Orion's Nebula). Then once I had the alignment working tried Pleiades and it centered perfectly in my 40mm. Super tight alignment isn't possible the way I'm doing it, but I was reasonably happy with what I could see and the clarity of this scope is insane. Even though things aren't as bright, they are super sharp. Looking at the trapezium is fun because it resolves to huge spaces between the four stars rather than one blob.
I had to try the camera and wasn't all that surprised when I couldn't see anything at all. I'll work through the book once I get the new timer and hopefully start making progress.
In any case I'm glad to be out there again in the cold and my observing chair worked perfectly :)
Thursday, December 8, 2011
Starting over
I just recently sold my XT10 and my Atlas Mount. I liked both of them, but they were pretty big and heavy which kept me from getting them out very often. I'm now trying to get started in Astro-photography. I've ordered a Canon EOS Rebel T3 (12.2 megapixel) DSLR and hopefully this will be a good camera to try Deep Sky imaging with. I'll be attempting to learn the camera with the 70mm refractor I bought to let Harrison use. It's nothing special and pretty light weight, but I think it'll make a decent starter for imaging.
Anyway - hopefully I'll soon have some pics to share - stay tuned.
Subscribe to:
Posts (Atom)